Using the auravant platform, the following steps must be followed to make a variable prescription of inputs (seeds, fertilizers, herbicides, etc.)
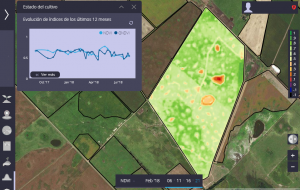
1- Select farm and field.
2- Choose the NDVI image on which you are going to make the application.
3- Select the option “Histogram” in the left side menu.
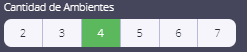
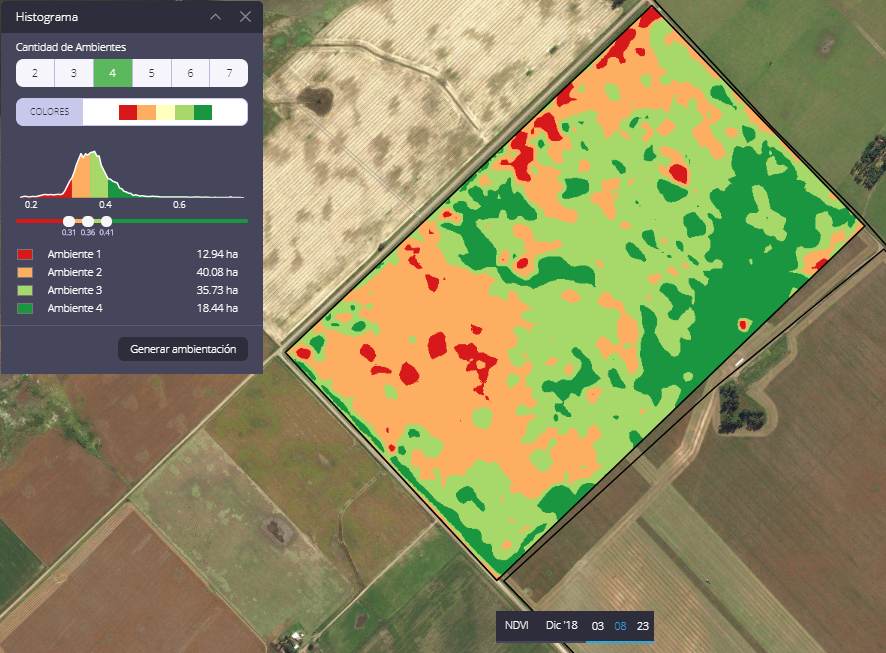
4- I chose the number of zones/sectors being able to select from 2 to 7.
It is also possible to select different color scales, the most frequent being red to green and green to red.
To change a particular color you must click on the cell with the color in question and change it within the palette available
Finally, by sliding the dots over the bar you can enlarge or reduce the size of each area and visualize in the lower sector its respective size
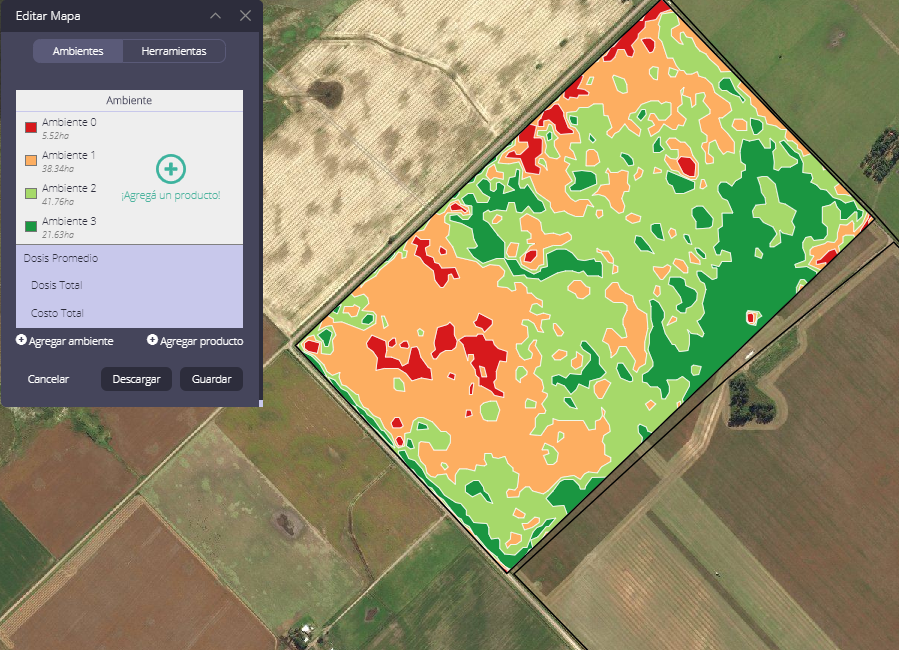
5- Click on “Generate Prescription”. Wait a few seconds for the prescription preview to be generated. You will see this message:

Voilá!
This is what your prescription will look like. Now is the time to define quantity, cost and type of input to use, as well as edit the prescription to adapt it to tests, controllers, etc.
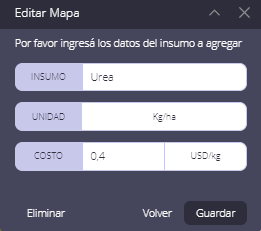
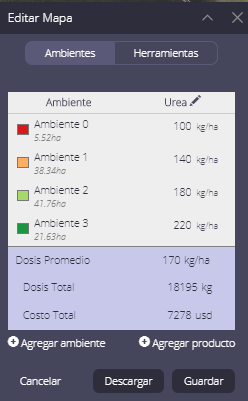
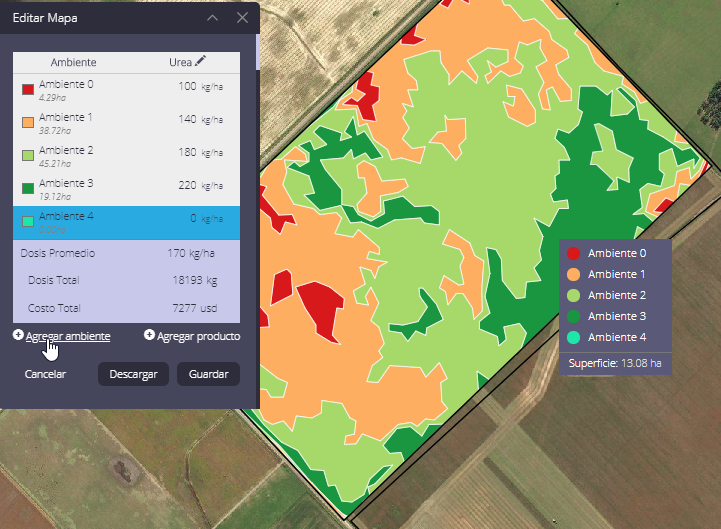
6- Click on “Add a Product” to create the input. There you can enter the name, the unit and the cost per unit. This way, when adding the doses within the prescription, we will obtain the application and cost averages.
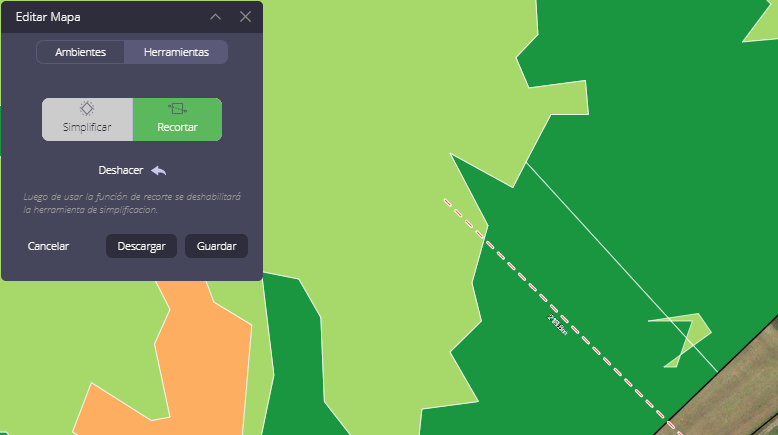
7- Now, by clicking on “Tools”, you can continue editing the map. The map simplifier allows you to extract points from each polygon and the zone remover eliminates small polygons. In this way we can, on the one hand, obtain less complex prescriptions as a consequence of a lower weight of the final files, and on the other hand, eliminate areas where the machine will not be able to perform a dose change.
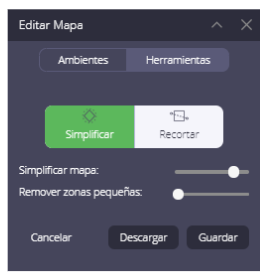
Finally, with the trimming function, each sector is divided to generate new field zones or perform treatments and tests.
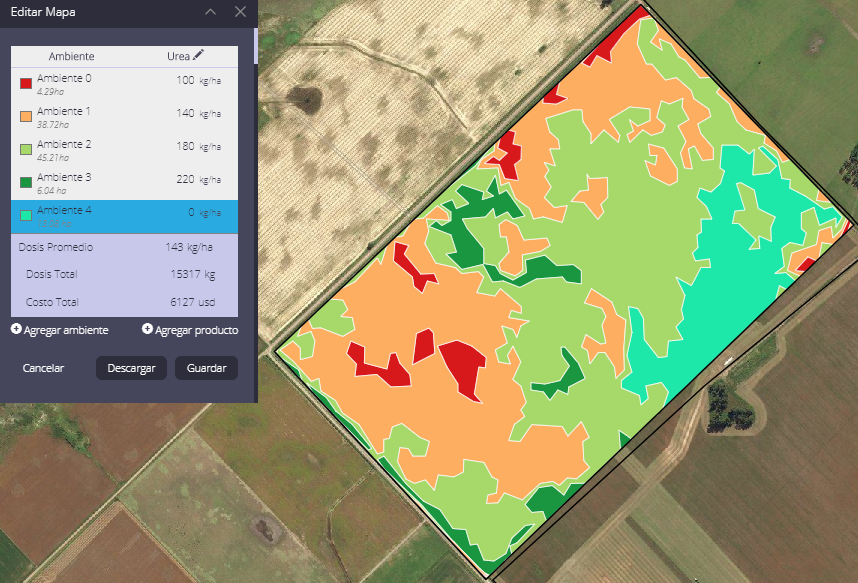
8- Also by clicking on Add Field Zone, you can generate new zones and assign them their respective doses. In this case, we create Field Zone 4 and indicate the new zone by right-clicking on it.
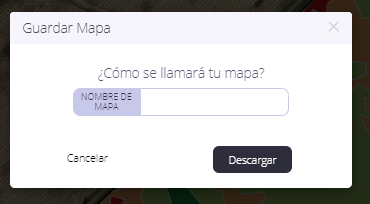
9- You are almost there! Now click on Save and Download. In the case of the first option, the map will be saved in “My maps” section.
“