Store your grain and input stocks, link them to your activities, and ensure traceability of your agricultural products.
With this new tool, you’ll be able to create warehouses to store your inputs, buy, sell, or transfer them according to your needs, and associate them with your activities.
What benefits will you get?
✅ Increase traceability of your inputs and have greater control over movements in your warehouses.
✅ Save time and optimize your stock control by identifying missing inputs for use in your activities.
✅ Reduce costs and streamline your input purchasing planning by anticipating market demand.
✅ Increase productivity by knowing the quantity of inputs stored and planning commercial or management strategies on the farm.
How to use it? Here’s a step-by-step guide:
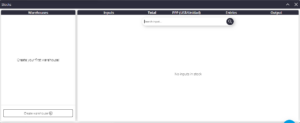
1- Go to the “Management” module in the “Stocks” tool. If you haven’t created any warehouse or shared by another user, the first thing you need to do is create one by clicking on “Create warehouse”.
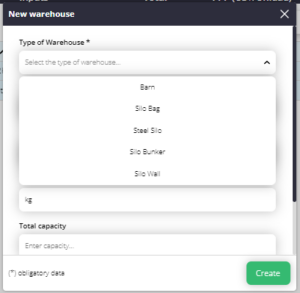
Types of warehouses:
- Warehouse
- Bag silo
- Conventional silo
- Bridge silo
- Cell
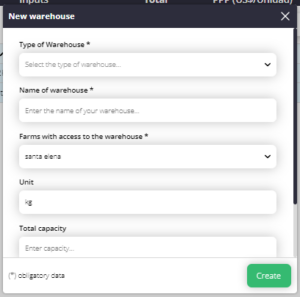
Once the warehouse type is selected, you’ll need to complete the following information:
- Warehouse name
- Fields with warehouse access
- Unit
- Total capacity
*If you choose a warehouse, it will only ask you to complete the first two points.
2) Once the warehouse is created, we can start making movements (purchase, sale, movements between warehouses, losses).
In this case, we choose to make a purchase for the warehouse. We fill in the date, select the types of product we want to buy with their corresponding quantity and unit.
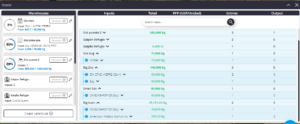
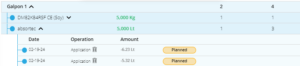
3- Once the purchase is made, you can see on the left the different types of warehouses created with information about the % of space occupied and information about the stored product.
On the right side, you will see the complete inventory of all warehouses the user has permission to access. By selecting one of them, you’ll have access to a breakdown with information about the Product:
- Product name
- Total quantity
- Total inputs
- Total outputs
By selecting one of the products, you can access a second breakdown showing the different existing movements of that product:
- Movement date
- Operation
- Quantity (Entries will be displayed in green and exits in red and gray).

IMPORTANT: When the activity is in the “planned” state, it does not deduct stock but it is reflected with the label “planned” and in gray.
Linking with Activities
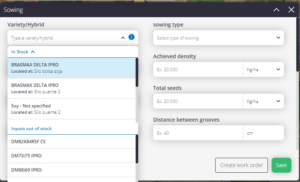
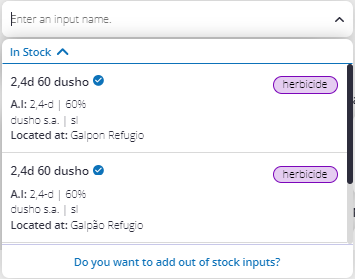
When you create an activity such as (planting, application, harvest), you can associate it with the stock module.For example, in the case of applications and planting, when selecting the variety of input to use, the ones that will appear first in the list are those that you have in stock in any of your warehouses.
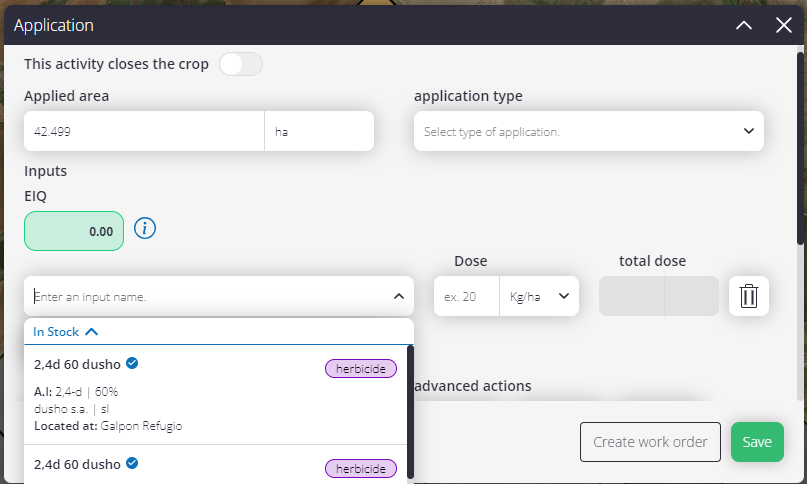
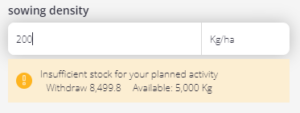
If you exceed the planting density with respect to the stored stock, a message will appear. The same will happen if you exceed the available dose when making an application.
In the case of a harvest task, if the state is “executed”, when entering the “actual yield” data, you can select the warehouse where you want to store it.
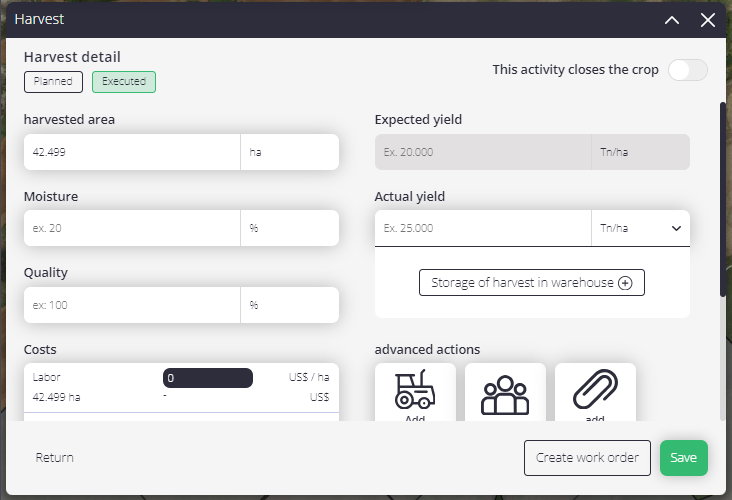
IMPORTANT: Once an activity is executed, you will be able to see reflected the increase or decrease in stocks movement within the inventory tool in the stocks tool.
Log in